Monday, September 29, 2014

Elderberry Syrup for cold or flu

It took me entirely too long--several months--to make this syrup. Elderberry syrup helps prevent and treat flu and other illnesses. Start taking this syrup at the first sign of the flue. Elderberries are very high in vitamin A, has more vitamin C than oranges, are very high in antioxidants, are anti-inflammatory and possess antiviral properties that have been show to treat colds and flu.

Here are the elderberries on the stove.

Elderberry syrup
2/3 cup dried elderberries (I buy mine at Wilwand Tea Co. & Healing Arts in Atascadero)
3 1/2 cups of water
2 tablespoons fresh or dried ginger root (I used fresh ginger that I got at the farmers' market)
1 teaspoon cinnamon powder or 3 organic cinnamon sticks 
1/2 teaspoons whole cloves or clove powder
1 cup raw, local honey

Directions:
Pour water into a medium saucepan and add elderberries, ginger, cinnamon and cloves -- don't add the honey quite yet because the heat will destroy many of its medicinal benefits.
Bring it to a bowl, cover and reduce to a simmer for about 35 minutes to an hour, until the liquid had reduced by almost half (I was afraid that it had reduced too much, but turns out it was just perfect).
Remove from heat and let cool enough to handle
Pour through a strainer into a glass bowl
Discard the pulp and let the liquid cool to lukewarm
Add 1 cup honey and stir well
When the honey is well mixed into the elderberry mixture, pour into a pint-sized mason jar.
Store in the fridge, it will last for several months

To use, take 1/2 to 1 teaspoon for children and 1/2 to 1 tablespoon for adults once per day or every 2 to 3 hours if the flu does strike.
Can also drizzle it on ice cream or pancakes.

Vegan Chili

My favorite dish to make is chili. I've been making it for almost 20 years. The first recipe was one can kidney beans, 1 pound ground beef, one can tomato sauce, one can tomato paste, water, chili power and red chili pepper flakes. The end. It was just the right size to feed family of four.
Over the years the recipe has morphed. Slowly I replaced the ground beef with ground turkey and replaced the kidney beans with black beans--well I would add black beans along with kidney beans and pinto beans--and added bell peppers and onions. And it's just kept on changing until it is what it is today. My current recipe is vegan and it didn't happen on purpose. One time I put in quinoa but forgot the meat and it was good. So I started making the chili without the meat, then I decided I wanted to make the chili with meat and it just didn't taste right (though I have to say that local, organic, grassfed beef is way better than conventionally raised/produced beef, by the way), so I no longer use meat.
Now I have made some additional changes, I replaced the beans with azuki beans that I make from dry beans I buy in the bulk bins at the health food store (I go to Harvest Natural Food in Atascadero, SLO Natural Foods in SLO and Whole Foods in SLO).


When using dry beans, start by rinsing them in cold water--I do it quickly to use less water, but they do need a quick rinse before cooking.

Then add one cup of azuki beans to four cups of boiling water (turn off heat) and soak for an hour. Then turn heat on again and simmer for about 2 1/2 hours (I include that time in my simmering time for the chili).

After the beans are done soaking and are simmering, I saute the veggies till the onions are clear and the peppers soft.

Then I add the spices--don't over do it in here, you can always add more spices later, I always do.
Then add all the veggies to the pot of beans, then add chopped tomatoes and more spices as needed--and sea salt.

The last thing I add is the quinoa--already cooked.

To finish the chili, I top it with a chopped avocado (can also use guacamole instead), chia seeds and hemp seeds. And more sea salt as needed (I've found that as I eat less processed food, the more salt I seem to need).

Chili recipe
1 cup dry azuki beans
2 tablespoons coconut oil (or grape seed oil, or water, or veggie broth)
2 onions, chopped
four cloves garlic, finely diced
three bell peppers (I use one of each: red, yellow and orange), chopped
2 jalapenos, chopped (I remove most of the membranes and seeds, but not all because I like a little heat, so if you don't like much heat, make sure to remove all membranes or seeds, or skip the jalapenos altogether)
1 teaspoon cumin
2 teapoons ground chili pepper
1 teasppon red chili pepper flakes
1/2 cayenne powder
sea salt to taste (I use pink Himalaya sea salt)
4-5 medium to large tomatoes (I like to use heirloom tomatoes), chopped
1 cup dry quinoa
1 avocado (per serving)
1 tablespoon hemp seeds (per serving)
1 tablespoon chia seeds (per serving)

Boil four cups of water in a medium pot on the stove, once boiling turn off heat and add one cup dry azuki beans (rinse first). Soak the beans for an hour. Then turn heat back on to simmer the beans on low-medium heat. While the beans are simmering, heat the oil or water on medium in a large sauce pan and add onions, garlic, peppers and jalapenos and heat until the onions and garlic are clear and the peppers are soft. Then add spices and simmer for five more minutes (add a little water or veggie broth as needed). Add the sauteed veggies to the beans. Next add chopped tomatoes. Let the chili simmer for 2-2 1/2 hours. While the chili is simmering prepare the quinoa. Rinse the dry quinoa under cold water then add to two cups water and heat on high and bring to a boil, then turn heat to low and cover. Let simmer until the water is absorbed, then turn off heat.
Taste the chili, adding more spices and salt as needed.
Mix quinoa into the chili and let simmer a few minutes longer before serving. This makes enough chili for one person to eat for a week or for a few meals for a family. You can freeze individual servings for later.
I package my leftover chili in glass containers and eat throughout the week--I reheat on the stove rather than the microwave.

What did you think of it? What changes did you make to the recipe?

Sunday, September 28, 2014

Vegan caprese salad

I love, love, LOVE caprese salad, but now I cannot have cheese. Bummer. So I modified it a bit to make it fit my diet. I probably eat this salad too often, but it's a quick and easy snack or lunch to make. This is something I don't share with my daughter because of the tomatoes, which is a bummer because it is SOOO good, but more for me. I figure it's OK to eat it often now, but once the tomatoes are out of season I won't make it until next season.


When I make this to take with me, I put the avocado on the bottom of the bowl to keep the avocados from turning brown.

1 ripe avocado, chopped
Tomatoes, any color and any variety (I use heirloom of all varieties/color) How many I use depends on the size of my bowl.
Fresh basil, chopped
Local extra virgin olive oil drizzled on top
Sea salt to taste
1-2 teaspoons chia seeds
1-2 teaspoons hemp seeds

Enjoy!

Chocolate chip cookies

I've been trying to figure out a decent chocolate chip recipe that fits into my daughter's allowable food. This recipe is in no way healthier than regular chocolate chip cookies (there's just as much sugar, though it uses organic and cane sugar), but it does allow my daughter to have a tasty chocolate chip cookie that won't give her any problems. This batch I made for church, but the next batch I will freeze the two-inch balls so I can pull one or two out at a time and make a fresh-baked cookie. Yum!
Now, you'll have to excuse my photos...they don't look as good as they taste. Try a single batch and see what you think. I'm still on the hunt for a tasty cookie recipe that has less sugar, but for now, this will do.


The cookies look yellowish in the photo. They taste pretty good, even as though they contain butter (which they don't, I ran out of coconut oil, so it's half coconut oil and half grape seed oil).

Gluten-free, dairy-free, egg-free chocolate chip cookies:
  • 2 1/3 cups flour blend (be sure to read the label for any allergens and/or cross contamination)
  • 2 1/3 teaspoons xantham gum (unless the flour blend contains xantham gum)
  • 1 teaspoon baking powder
  • 1/2 teaspoon baking soda
  • 1/2 teaspoon sea salt
  • 3/4 cup organic brown sugar
  • 1/2 cup organic cane sugar
  • 1/2 cup coconut oil, softened (or grape seed oil)
  • 1/4 cup unsweetened non-dairy milk, room temperature
  • 2 tablespoons pure maple syrup, room temperature (or honey)
  • 2 teaspoons pure vanilla extract
  • 1 1/4 cup dairy free chocolate chips (be sure to read the label for any allergens and/or cross contamination)

Preheat oven to 350 degrees. Line baking sheets with parchment paper. In medium bowl, sift together flour blend, xantham gum, baking powder, baking soda and salt. Set aside. In large mixing bowl, cream together the brown sugar, sugar and coconut oil, 1-2 minutes. Add coconut milk, maple syrup, and vanilla. Mix until blended. Add the flour mixture and chocolate chips. Stir until just combined. Roll 2-tablespoon size scoops of cookie dough into balls and place onto prepared baking sheet. Slightly flatten with fingers. Bake for 8-9 minutes. Do not over-bake (cookies will be soft to the touch). Place cookies on cooling rack to cool completely. Store in air-tight container.
I got the recipe HERE.

** Always check labels of every packaged food you buy to check for any hidden ingredients that you are allergic to or any cross contamination. The label will usually alert you to any cross contamination. For serious allergies, you can look up information on the company's web page or call the company.
If you are making this recipe for someone else with an allergy or sensitivity be sure to ask them about cross contamination, and any suggestions for brands to use if you are unsure. It's better to be safe than either show up with something your friend can't eat or something that makes them sick. **

Saturday, September 27, 2014

Pancakes!!!!

Pancakes are a favorite breakfast (and sometimes dinner) food in my house. The challenge has been making them gluten-free and dairy-free and tasty. I did that. Then I had to make them egg-free. That was more of a challenge. I started subbing applesauce for egg, but they were too dense, and not so tasty, though my daughter still ate them all.
I usually make pancakes on Saturday or Sunday mornings, and make a rather large batch so I can freeze a bag full for quick breakfasts throughout the week--just toss a frozen pancake in the toaster.
I finally found a GOOD (read: tasty) gluten-, dairy- and egg-free pancake recipe. It can be vegan (I was out of syrup, so I used local, raw honey instead) pretty easily.

Here's what the batter looks like after mixing everything together.

The pancakes on the stove. Looks pretty good. Would look better if my pancake cooked them more evenly...

Two pancakes all done.

You can see the fluffiness! So much better than the dense ones I made last.

And finally, the pancake topped with almond butter. My daughter likes to top that with jelly. She no longer asks for syrup or honey to go on top (phew!). I happily eat my pancake like this with a side of scramble eggs (I can still eat eggs...).

Gluten-free, dairy-free, egg-free Pancake Recipe
1 cup of gluten free all-purpose flour (be sure to check the labels or with the company for any allergens and/or cross contamination)
1 tablespoon flax meal (you grind it yourself, but I buy a bag of golden flax meal--Bob's Red Mill)
2 tablespoons organic Grade B maple syrup (or local, raw honey)
2 teaspoons baking powder
2 teaspoons ground cinnamon
1 teaspoon vanilla
1/4 teaspoon salt
1/4 cup of unsweetened applesauce
1 cup of non-dairy milk (choose whatever milk is your favorite)

Instructions:
Mix together dry ingredients. In separate bowl mix together wet ingredients and then slowly add to dry ingredients.

I found the recipe HERE--much better than my iPad photos.

I make a large batch (after trying out a single batch first) and freeze the leftovers. I line a baking sheet with parchment paper and freeze the pancakes on there, then put in a ziplock bag so the pancakes don't stick together and I can pull one out at a time and toss in the toaster for breakfast for my girl. I also freeze both uncooked and cooked bacon and sausage (I freeze them on the pan so I can pull on out at a time) so I can grab and go (with the cooked meat) or just cook one at a time for the uncooked when I have more time. Be sure to read ingredients on the packages to get the least processed meat and pay a little more for the organic, grass fed animals. Meat usually isn't gluten-free unless it says so on the package because many animals are fed a diet of grains.

** Always check labels of every packaged food you buy to check for any hidden ingredients that you are allergic to or any cross contamination. The label will usually alert you to any cross contamination. For serious allergies, you can look up information on the company's web page or call the company.
If you are making this recipe for someone else with an allergy or sensitivity be sure to ask them about cross contamination, and any suggestions for brands to use if you are unsure. It's better to be safe than either show up with something your friend can't eat or something that makes them sick. **

Friday, September 26, 2014

Hummus


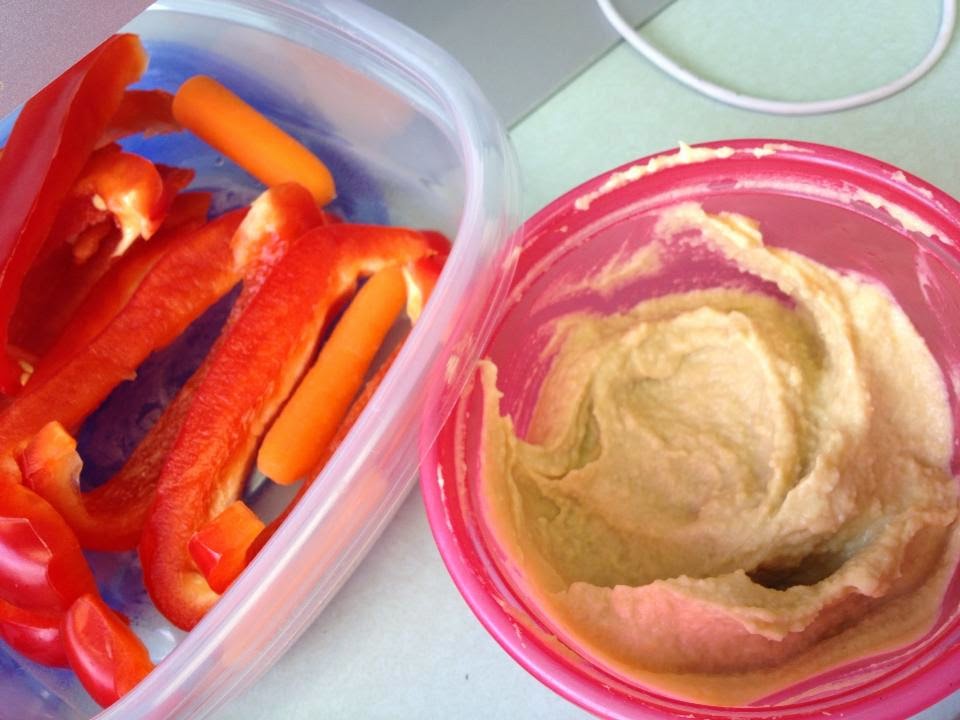
One of our staple foods in our diet is hummus and over the years I've perfected my own hummus recipe. I usually make a double batch (as seen below), but I'll give you the recipe for a small batch. Always good to try a smaller yielding recipe to see how you like it and what tweaks you need to make -- all of our pallates are different, so what I like you won't necessarily like. And I take no offense for you to take my recipe and change it -- that's what I do afterall.
I'll be giving you recipes on this blog, but do keep in mind that I don't completely follow recipes, I think "Hmmm...I don't have that, so I'll use that" or "I don't like that ingredient, so I won't use it." Sometimes it's fine and sometimes it's not. I learn from every experiment.
In high school, I went to Russia for a month with eight other students from my high school (including some of my best friends, and some people who later became my best friends) and the assistant superintendent. On the way home, my friend Lisa was complaining about a recipe she got from her host family for a fermented fruit drink. It said throw this in and a dash of that. I laughed and said, "that's how I cook." She laughed and  said something along the lines of "of course you do." Do you remember, Lisa?
That conversation continues to remind me that we all cook differently. And I've learned sometimes (such in baking) you can't go off recipe or things won't turn out quite right. But do note that I do still go off recipe and sometimes things are fine, and sometimes they are quite terrible. So terrible I have to throw it all out.
So about hummus...
I had never, ever heard of hummus until I went to college. Right away I got involved with the ECM (Ecumenical Christian Ministries that was run by a United Church of Christ minister--my dad is a UCC minister, so he had told me to look up Thad Holcombe, and the rest, as "people" say was history). One major weekly event sponsored by the ECM was Veggie Lunch. Growing up in rural Kansas, vegetarianism was not highly regarded. My best friend, Sarah Price, was vegetarian, but it wasn't understood. I barely understood it--until later. Until Veggie Lunch I didn't even know about veganism.
At that first Veggie Lunch food ran short--as it always did as more and more people showed up -- and Thad sent the cooks out for hummus. I don't remember if I tried it or not then. I was a bit scared by it. But I eventually tried it and over the years it grew on me. So I naturally started giving my daughter hummus as a baby--it was a pureed food after all...
As my tastes and diet have changed over the year, I have found myself wanting to make more and more of my own food from scratch so I can control what goes into my food, into my body. And hummus is quite easy.
The first time I made hummus, it was thick and didn't taste very good. I learned it was because I didn't use tahini, which is crucial.


Heather's Hummus Recipe:
1 can garbanzo or chick peas (if you soak and sprout your own beans, use two cups of soaked and/or cooked beans--I have tried making raw hummus and I did not like the taste of it. My friend, Stephanie Austin, who is vegan and a holistic healing practitioner, told me to soak the beans with a piece of seaweed--I haven't tried that yet)
1/4 cup tahini sauce (I use the white dip from Trader Joe's, be sure to read the label for any allergens or cross contamination)
Lemon juice (I juice my own lemon, I'd suggest 1/2 a lemon)
Extra Virgin Olive Oil (I use local, organic EVOO because the imported brands aren't necessarily 100% EVOO, but the California certified ones are. I have an olive oil from Trader Joe's in the photo, I tossed it in the photo because I was out of everything else)
Fresh garlic to taste (I like mine garlicky so I'll use 2-4 cloves)

Drain the can of garbanzo beans into a cup or bowl and set aside. Pour beans into food processor (or blender), tahini sauce and some liquids from beans. As the food processor is going, I drizzle in olive oil, lemon juice and liquid. I also toss in the garlic. I keep checking the consistency of the hummus, stopping to taste and scrape the sides of the processor. I like my hummus smooth and not to thick, so I run the food processor for at least five minutes, checking often, adding more liquid as needed.

Sometimes I had a dash of tumeric or a dash of cayenne. I love the roasted red pepper hummus found in the grocery store, but I haven't tried to make that yet. But I will. And I will share it here.

** Always check labels of every packaged food you buy to check for any hidden ingredients that you are allergic to or any cross contamination. The label will usually alert you to any cross contamination. For serious allergies, you can look up information on the company's web page or call the company.
If you are making this recipe for someone else with an allergy or sensitivity be sure to ask them about cross contamination, and any suggestions for brands to use if you are unsure. It's better to be safe than either show up with something your friend can't eat or something that makes them sick. **

Thursday, September 25, 2014

Ground Breaker Brewery--100% gluten-free beer and food!!

On a recent road trip to the Pacific Northwest, I planned a stop in Portland knowing that the likelihood we'd find a delicious meal that met all of our food requirements was pretty good. And I was right. I Googled "gluten-free restaurant + Portland" and one of the first places in the results was Harvester Brewing (since we stopped, the name has been changed to Ground Breaker Brewing). Having not had beer, save for cider, I jumped all over the chance to have beer without the symptons I get from gluten.

My girl enjoying a hazelnut and jelly sandwich on gluten-free bread with apple chips and lemonade. The usual food she gets when we're on the road is a grill chicken breast and steamed veggies because nearly all children menus include hamburgers, hot dogs, quesadillas, pasta or mac n cheese or grilled cheese sandwiches. Once you count out gluten and dairy, all you have left is a hamburger with no bun or a hot dog with no bun and she likes that idea less than the grilled chicken and veggies.


I got a cheeseburger (oh, yes, I splurged on cheese!) on a gluten-free bun, of course, with house-made ketchup and kale chips AND a flight of beer. Oh, how I've missed beer. Ciders are fine, sometimes, but I miss ales and dark beers. Still didn't get any dark beers, but got ales and some fruity beers. Delish!

The most exciting part of the meal was dessert. We were both very excited since we don't get dessert all that often (both for our health and because nearly all of them contain gluten or dairy). This is a lemon coconut pudding and two gluten-free chocolate chip cookies. Not only were they house-made, they were freshly out of the oven. The whole meal was a dream from start to finish. I couldn't stop raving about how nice it was to have a burger with a delicious bun, and beer, and dessert. I highly recommend a stop at this gastropub next time you're in Portland.

We're allergic to everything! What do we eat??

The first question I get after I tell someone that my daughter and I cannot eat gluten or dairy, PLUS my daughter cannot have eggs, quinoa, soy, corn, hemp seeds, nitrates, Yellow dye, artificial coloring, strawberries, tomatoes and oranges. She's 5. So that's fun.
But over the last year (how long we've known about the dairy, strawberries, tomatoes and oranges--which has cleared up her excema-- and gluten, which has allowed improved her sleep, moods, emotions, attention and stomach problems) we've slowly figured how important it is to stick to the restrictions and what we can eat instead. My daughter is in no way deprived, she just doesn't have the same junk as everyone else. She still has junk that is just as unhealthy as everyone else's, it's just different.
Since the beginning of this year, we've add to add eggs, quinoa, soy, corn, hemp seeds, nitrates, Yellow dye and artificial coloring to the list. That's been tough. Especially being gluten free, since quinoa, soy and corn are often used as subs for gluten. At first I thought, "Whatever, no big deal, it doesn't make a difference." But, oh, have I noticed a difference, so I stick to that pretty strictly for her. It makes both of our lives better.
Sooooo...the ever-present question: What do we eat?
That is what I'm going to answer in this blog. I've been struggling with finding adequate subs for eggs. My first pancake attempt ended up with ultra-dense pancakes there were less than yummy. I believe if I'm going to eat something, I'm going to enjoy it. So I've been experimenting with different recipes and subbing out different things to see what works best. I finally found a light and fluffy pancake that is gluten-, dairy- and egg-free. I did a little happy dance around the kitchen. It would have been vegan except that I'm out of maple syrup, so I used honey instead.
I loved them and my daughter did too (although she was OK with the dense pancakes....). I haven't tried them out on a kid who eats the Standard American Diet to see how it stacks up. If anyone wants to come and be a taste-tester, I'm all for it.
Now that it's fall, I'm excited to try my hand out gluten-, dairy- and egg-free pumpkin recipes. I made a pretty good pumpkin pie last year, but that had eggs in it. To get a notification every time I posted a new blog post, be sure to subscribe. I'm always making something new and experimenting, so I'll have plenty to share.
Got a question, suggestion or tip to share? Email me at heatheryoung805@gmail.com